DIY pfSense Firewall/Router Part 3: Wireless Access Point
In the second part we installed pfSense and did some general setup. In this part I’ll show you how I setup my pfSense to act as a wireless access point.
By plugging in a laptop Wireless LAN card in your pfSense you could utilize pfSense to act as a Wireless access point. Please note that FreeBSD/pfSense best supports wireless networking cards that use parts made by Atheros. I think that FreeBSD development of wireless support have been made against Atheros devices and that’s why these are best supported. You may be able to get this to work with wireless cards from other manufactures, but this post will not explain how to get that to work.
Wireless networking card
I bought a used Atheros AR5009 AR9281 AR5B91 Half Mini PCI-e WLAN Card 802.11b/g/n 300M card on the swedish e-commerce site Tradera for about $20. I actually had a look at the FreeBSD Atheros Wifi hardware support page and AR9281 was included on that page and seemed to be supported. I also used Google and pfSense forums to find some more indications of people using this card as Wireless access point with great success.
You can find cheap Atheros cards everywhere, for example a copy of my card seems to be sold on both Amazon and Ebay.
Installation
First I put my Atheros card in the available Mini PCI-e port and then attached the existing Wifi antenna cables.
Kernel configuration
To use wireless networking in FreeBSD/pfSense the kernel needs to be configured with the appropriate wireless networking support. The kernel is separated into multiple modules so that only the required support needs to be configured.
You’ll need SSH access to your pfSense. Please have a look at How to enable SSH access in pfSense.
Connect thru SSH using your favorite shell. The username is root and the password same as accessing the pfSense WebGUI.
ssh root@<pfSense hostname>
You’re now at the pfSense console menu and you should enter the FreeBSD shell, for me this is number 8) Shell.
Enter 8 and press enter. You should now have shell access to your pfSense. Use vi to edit the kernel configuration.
vi /boot/loader.conf
Add if_ath_load=”1” at the end of the loader.conf file. By doing this we tell the kernel to load the Atheros IEEE 802.11 wireless network driver.
Exit the FreeBSD shell by writing exit and press enter. Now back at the pfSense console menu reboot the system, for me this is number 5) Reboot system.
Enter 5 and press enter and then follow the instructions.
When system has rebooted the pfSense should hopefully have identified the new wireless networking card.
Wireless interface configuration
Back in the WebGUI. Navigate to the Interface Assignments page, Interfaces => (Assign). At the bottom you should now find your new wireless networking card in the Available network ports dropdown. It’s possibly named ath0 or similar. Select it and click on Add. This will create a new interface in the list on the Interface Assignments page and are possibly named OPT1. Click on the new interface.
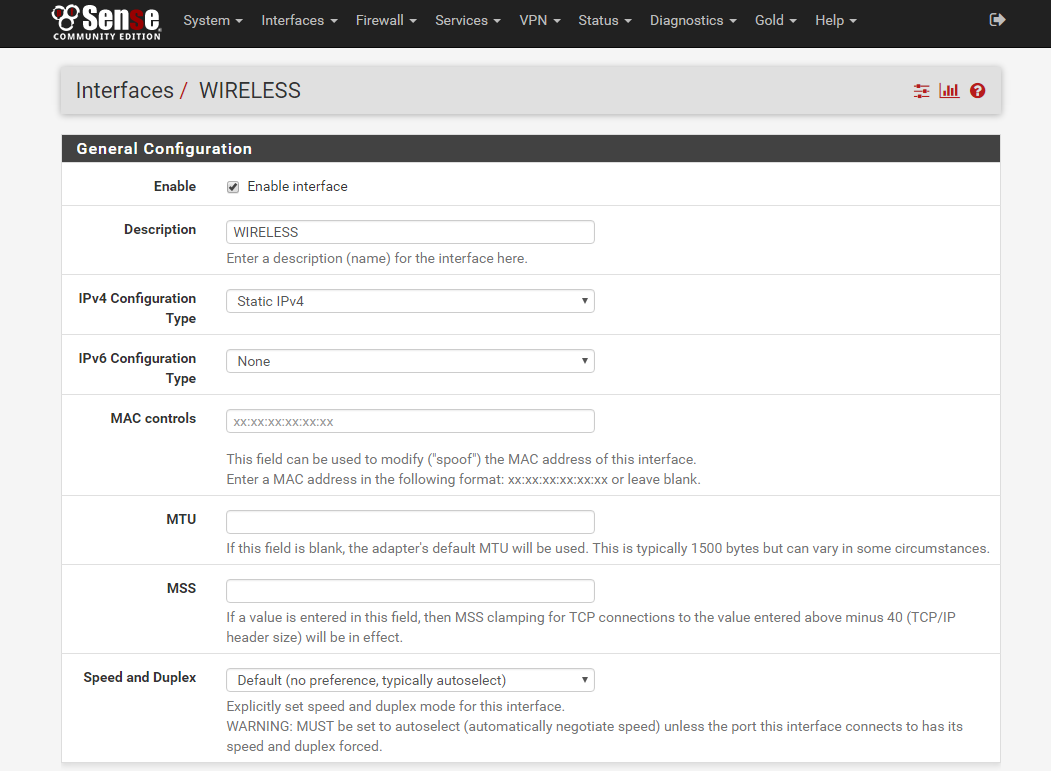
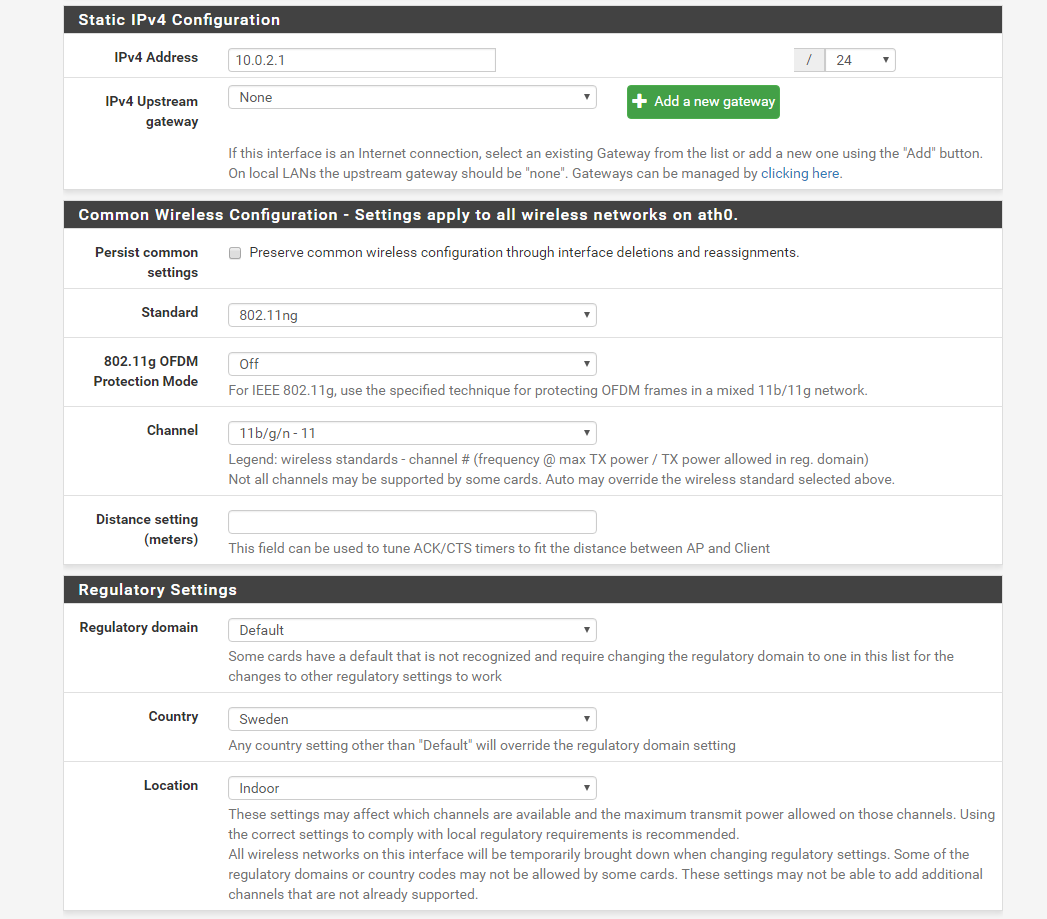
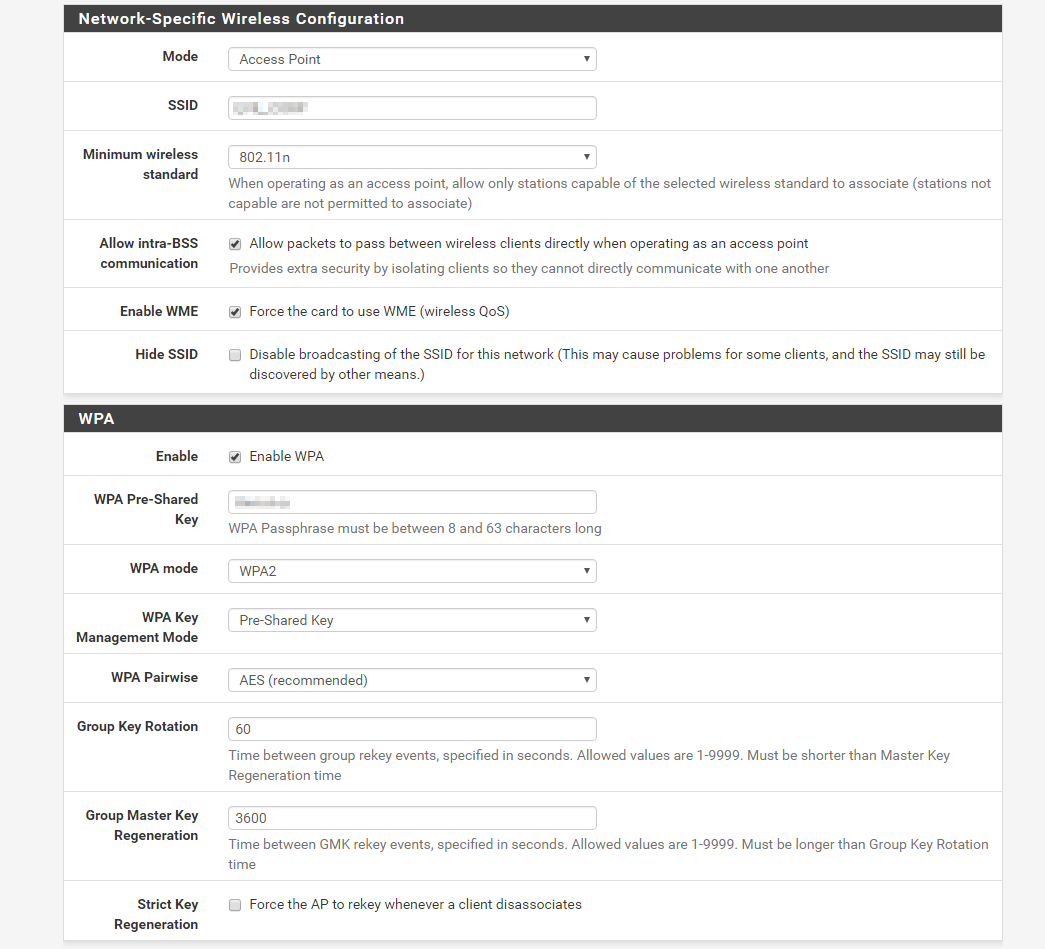
Here you configure your new wireless interface. In screenshots below you can see how I’ve configured my wireless interface. Make sure that you enable the interface otherwise it will not work. The IPv4 address you configure according to your network setup. Which channel you should use is highly personal. I recommend that you use a Wifi analyzer tool of some kind to find the channel most suited for you.
Enable DHCP server on wireless interface
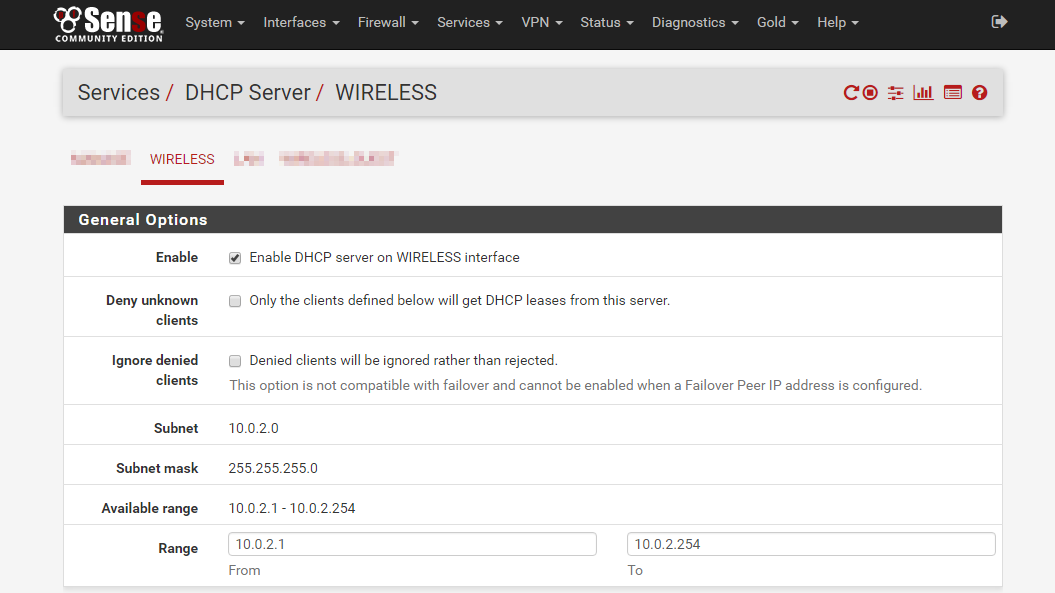
Navigate to the DHCP Server page, Services => DHCP Server and click on your wireless interface tab. Enable DHCP server on the wireless interface according to screenshot below. The Subnet, Subnet mask and range you configure according to your network setup.
I recommend that you reboot your pfSense before you try to connect to your wireless network.
Testing the wireless network
You should now find your new wireless network on a device with wifi enabled. Just connect according to your configured WPA pre-shared key.
Stuck beacon problem
After setting up my wireless network I had some problems regarding the wireless network got unresponsive after some connection time. I found some messages in the pfSense System/General log:
ath0: stuck beacon; resetting (bmiss count 4)
After some investigation I found a setting that solve the problem for me. Please note that this may or may not work for you. You’ll have to try it yourself.
Navigate to System => Advanced => System Tunables. Click on the New button and add the Tunable=hw.ath.bstuck and Value=8 and click Save.
More wireless interfaces, oh my
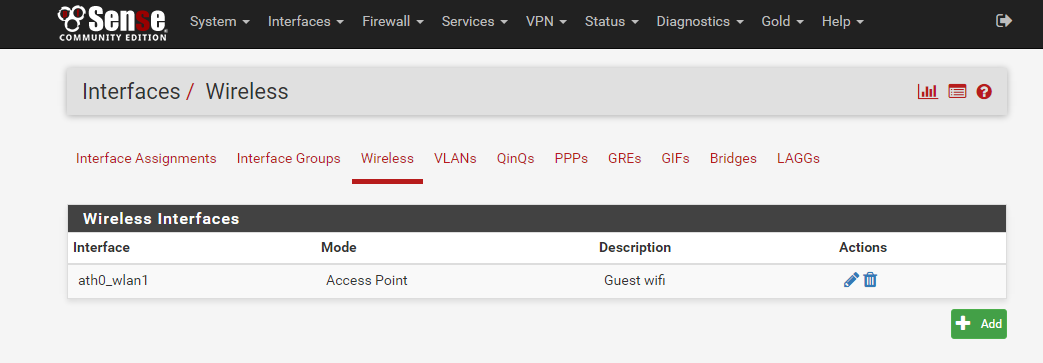
Suppose that you want to setup a wireless guest network, well pfSense could help you with that. pfSense actually lets you create multiple wireless interfaces. Navigate to Interfaces => (assign) and click on the Wireless tab. Click on Add and select the parent interface which is your wireless interface, select the Mode Access Point and give it some nice description. Now going back to Interface Assignments you should find your newly created wireless interface in the Available network ports dropdown. Just add it and configure it similar to your first wireless network and you have yourself a nice wireless guest network.
Conclusion
I’ve used this wireless setup for several months and I must say that it’s working really well and are extremely stable. Please leave a comment if something is unclear or if you have a question. This concludes the third part of my pfSense firewall/router.

